Installing NiFi 1.14.0 on Linux (non-production)
This post is going to walk through installing the latest release of NiFi on a Linux host (Fedora). This latest release is version 1.14.0 and an important change is that NiFi is now secure by default. This means that HTTPS is enabled out of the box (with self signed certs), user authentication is required and the default binding is to localhost/127.0.0.1.
Installing on Linux
The Linux host I am using is running Fedora Workstation 34, but the steps are pretty much the same on most flavours of Linux. If you’re on Windows, do yourself a favour and switch to Linux.
Installing Java
First of all, you need to have an install of Java. NiFi 1.14.0 supports Java 8 and 11, so I will use OpenJDK11.
On Fedora 34, you can find the available versions of OpenJDK by running
dnf search openjdkUse apt on Ubuntu or yum on centos/rhel 7.
I’ll install OpenJDK11 using the following
dnf install java-11-openjdk-develUsing the -devel package is not strictly necessary.
Let’s check that it has installed properly. Run the following
java -versionAnd you should see something like
openjdk version "11.0.12" 2021-07-20
OpenJDK Runtime Environment 18.9 (build 11.0.12+7)
OpenJDK 64-Bit Server VM 18.9 (build 11.0.12+7, mixed mode, sharing)
That’s Java good to go.
Installing NiFi
Let’s start by making a directory on our machine for NiFi.
mkdir ~/nifi
cd ~/nifi
Now we need to download the NiFi binaries. The downloads page is here. The mirrors page for the 1.14.0 release is here.
Start by downloading the nifi-1.14.0-bin.tar.gz from a mirror of your choice. You can either do this in your browser, or through the command line. Have the tar.gz file in your nifi folder. The file size is 1.3GB.
wget https://apache.mirrors.nublue.co.uk/nifi/1.14.0/nifi-1.14.0-bin.tar.gzDownload the SHA256 hash to the same directory.
wget https://downloads.apache.org/nifi/1.14.0/nifi-1.14.0-bin.tar.gz.sha256Now compare the hash to the file we downloaded to ensure we’ve got the right thing.
echo "$(cat nifi-1.14.0-bin.tar.gz.sha256) nifi-1.14.0-bin.tar.gz" | sha256sum --checkYou should see this if all is good.
nifi-1.14.0-bin.tar.gz: OKIf it doesn’t return OK, your download might be corrupt or incomplete.
Next, we need to unpack the archive file.
tar -xzf nifi-1.14.0-bin.tar.gzWhen that completes, you’ll have a new directory called nifi-1.14.0. Enter the new directory.
cd nifi-1.14.0/The contents of the directory should look like this
LICENSE
NOTICE
README
bin
conf
docs
extensions
lib
The conf directory contains configuration files, while bin contains scripts for starting or interacting with the NiFi process.
At this point, we can start NiFi using the following:
./bin/nifi.sh startThis will produce output similar to:
nifi.sh: JAVA_HOME not set; results may vary

Java home:
NiFi home: /user/nifi/nifi-1.14.0

Bootstrap Config File: /user/nifi/nifi-1.14.0/conf/bootstrap.conf
This won’t tell us if it has started or if there were any issues, so you will want to tail the nifi-app.log to watch for successful starts, error messages, and the auto-generated credentials.
tail -f -n 100 ./logs/nifi-app.logThe line that you want to be watching for is this:
2021-09-04 18:09:55,481 INFO [main] org.apache.nifi.web.server.JettyServer https://127.0.0.1:8443/nifiWhich tells us that NiFi successfully started and the UI is now available. This line contains the URL that the NiFi UI is available on. Pay careful attention to the address, as by default it is only available on 127.0.0.1, which means you’ll only be able to reach the UI from the same host that NiFi is running on. No other host on your network can reach this address.
You will also want to watch out for the following two lines, which contain the auto-generated admin credentials for logging in to NiFi.
Generated Username [96f17a45-5fa6-4ebe-bb3d-13dbdf836867]
Generated Password [dUYc1Pu835IgXO3txn1MqM2/YLNC1AYA]
To verify that NiFi is available, either browse to https://127.0.0.1:8443/nifi in your browser (again, this is ONLY on the same machine that is running NiFi) OR use curl to check from the command line.
curl -sSLk -D - https://127.0.0.1:8443/nifi -o /dev/nullYou will see a response similar to this, which means all is good (we get a 302 redirect into a 200 OK response, this is normal).
HTTP/1.1 302 Found
Date: Sat, 04 Sep 2021 17:19:27 GMT
Location: https://127.0.0.1:8443/nifi/
Content-Length: 0
Server: Jetty(9.4.42.v20210604)

HTTP/1.1 200 OK
Date: Sat, 04 Sep 2021 17:19:27 GMT
X-Frame-Options: SAMEORIGIN
Content-Security-Policy: frame-ancestors 'self'
X-XSS-Protection: 1; mode=block
X-Content-Type-Options: nosniff
Strict-Transport-Security: max-age=31540000
Content-Type: text/html;charset=utf-8
Vary: Accept-Encoding, User-Agent
Transfer-Encoding: chunked
Server: Jetty(9.4.42.v20210604)
At this point, NiFi is perfectly usable - if you can reach the web UI, you will see a logon screen and you can use the auto-generated credentials that we saw in the nifi-app.log to login. If that’s all you need, you’re done.
However, if you need NiFi accessible from other machines, perhaps because the machine running NiFi is a headless server (like mine) then we need to stop NiFi, change the bind host and start it up again.
First, stop NiFi using the same nifi.sh script as before:
./bin/nifi.sh stopOnce stopped, we need to edit the nifi.properties file which is in the conf dir.
vim ./conf/nifi.propertiesOnce in the file, you’re looking for the following lines:
nifi.web.https.host=127.0.0.1
nifi.web.https.port=8443
As you can see, we are binding to 127.0.0.1. Change this address to the one you want NiFi to be available on. I will use 0.0.0.0 which makes NiFi available on all interfaces.
nifi.web.https.host=0.0.0.0
nifi.web.https.port=8443
Start NiFi back up again.
./bin/nifi.sh startNow from another host on the network you can reach NiFi on the public address/name of the NiFi host. In my case, the NiFi host is on 192.168.2.2 (https://192.168.2.2:8443/nifi/).
That’s it. NiFi is installed and accessible on the network.
Common Issues
If you see this response in curl, it’s because you forgot the -k flag, which ignores the self-signed certificate warning.
curl: (60) SSL certificate problem: self signed certificate
More details here: https://curl.se/docs/sslcerts.html
curl failed to verify the legitimacy of the server and therefore could not
establish a secure connection to it. To learn more about this situation and
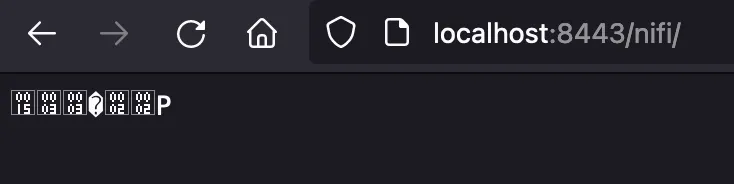
how to fix it, please visit the web page mentioned above.If you see this garbled response in your browser, it’s because you aren’t accessing the URL on HTTPS (you must use https://)