Building a simple REST API in NiFi
In a previous post I discussed using REST APIs to enrich records at the time of ingest. This post will cover building the corresponding REST API that I used in that post.
This will be a very simple REST API that exposes a single endpoint GET /api. This endpoint returns a 200 OK response with a small piece of JSON that changes based on the value of a URL parameter param1. Any other path or method will return a 404.
First, we need a web server that accept HTTP requests. For this, we can use the HandleHTTPRequest processor (behind the scenes this includes a Jetty web server).
Add the HandleHTTPRequest and double click it to enter the config window. You can customise the Port it listens on, but I will leave it at the default 80. You must add & enable a HTTP Context Map - simply select Create new service… from the drop down and create a new one with default settings (then enable it). Next is Allowed Paths that controls which paths the API will respond to - this is a regex pattern so can include many paths, but in my case I am only allowing one (/api). Lastly, set all methods except GET to false (e.g. Allow Post, Allow PUT, etc).
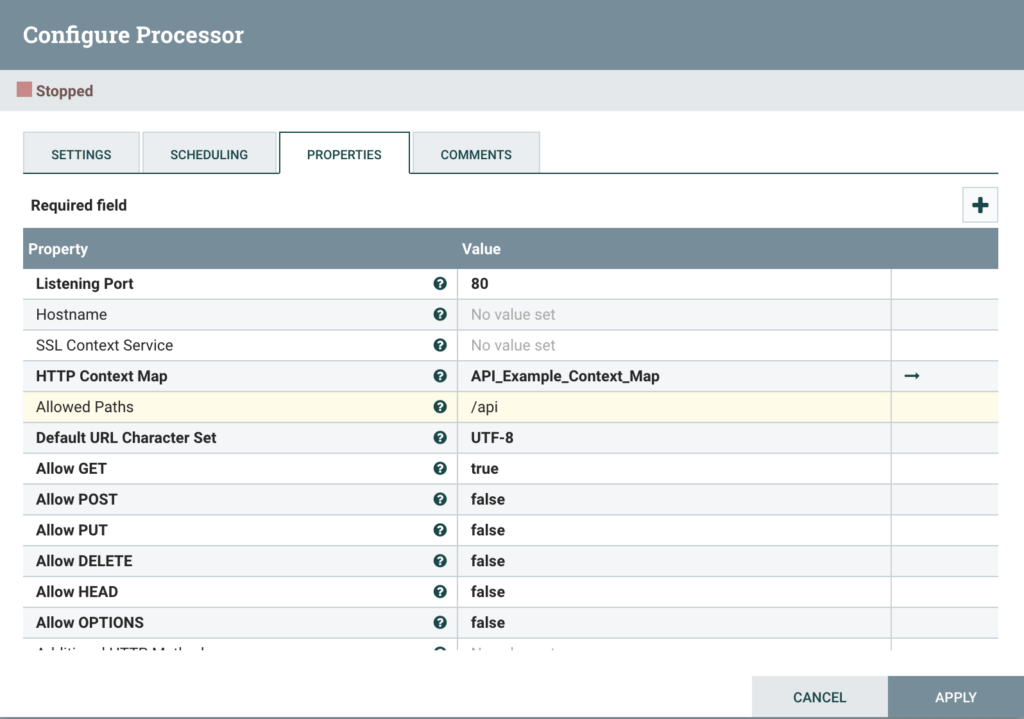
That’s all we need to accept HTTP Requests. Hit Apply.
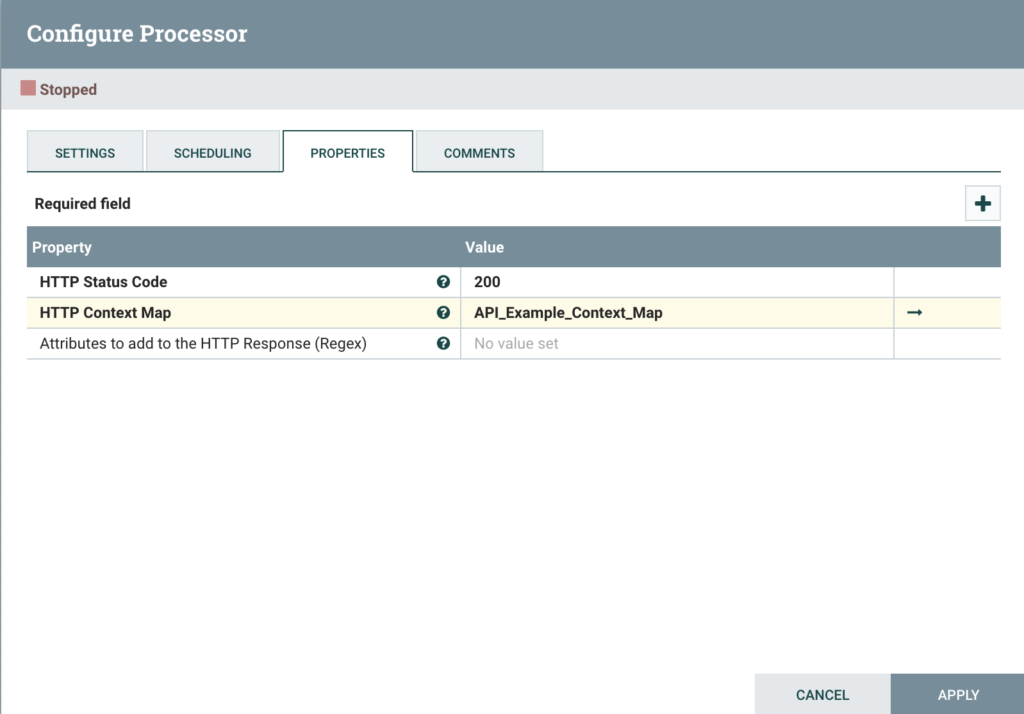
Now, we need to return a response. Add a new HandleHTTPResponse. Set the HTTP Status Code to 200 and for HTTP Context Map select the same service you created for the HandleHTTPRequest. That’s it, hit Apply.
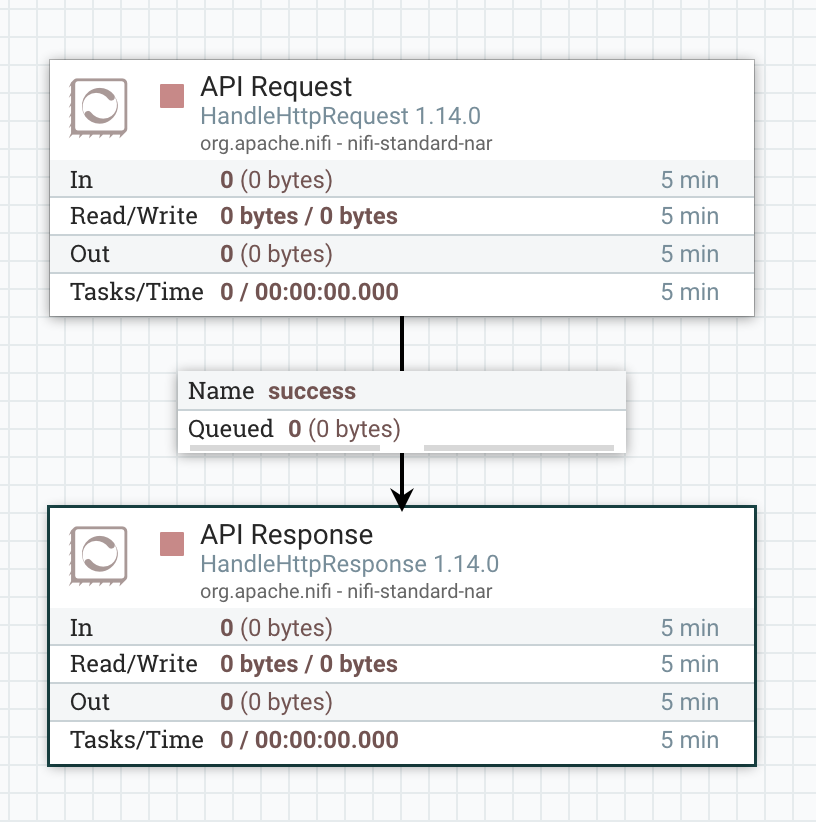
Now connect the Success relationship from HandleHTTPRequest to HandleHTTPResponse. Auto-terminate any other relationships (or add them to funnels if you want).
Start the processors and use CURL to test it.
$ curl localhost/api?param1=test -i
HTTP/1.1 200 OK
Date: Sun, 08 Aug 2021 19:47:54 GMT
Transfer-Encoding: chunked
Server: Jetty(9.4.42.v20210604)
Now that we have a basic Request>Response flow, we want to add some logic in the middle. Let’s quickly demonstrate returning a different response based on a URL parameter.
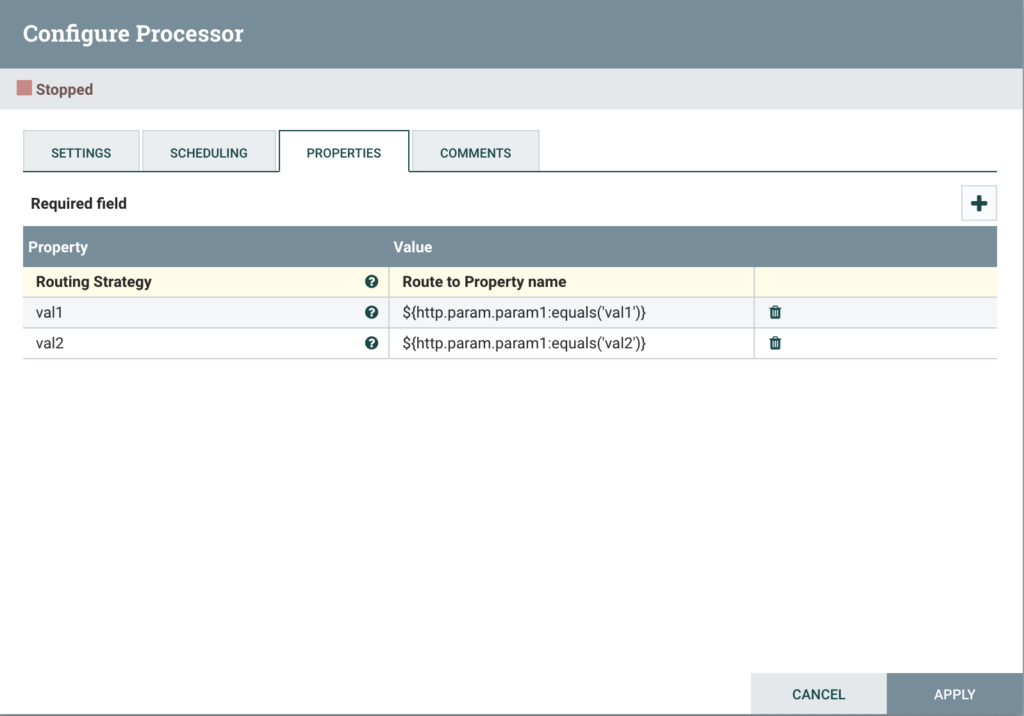
Add a new RouteOnAttribute to the flow and enter the configuration.
Add a new property with the + icon and name it val1. The value of this property will be:
${http.param.param1:equals('val1')}Do the same for val2 as below.
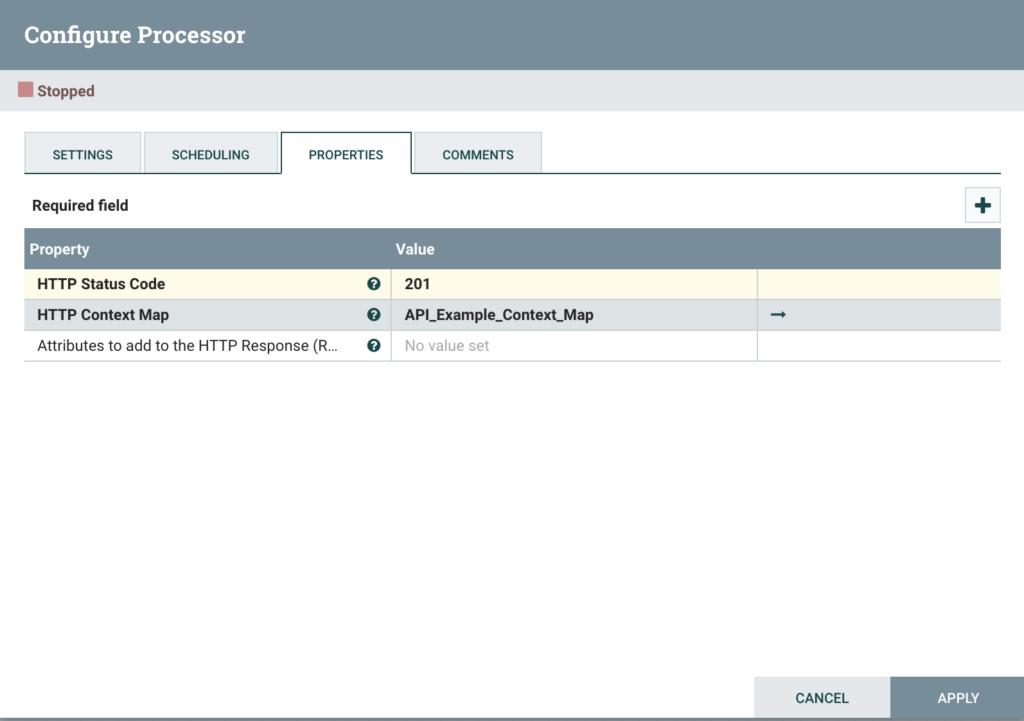
Create a copy of the HandleHTTPResponse (click on it, Ctrl+C, Ctrl+V) and modify the config of the copy. Change the HTTP Status Code to 201.
Now connect them all together. The HandleHTTPRequest should feed in to the RouteOnAttribute. From RouteOnAttribute, the val1 relationship should go to the first HandleHTTPResponse with the 200 response code - the val2 relationship goes to the second, with the 201 response code. See the screenshot below.
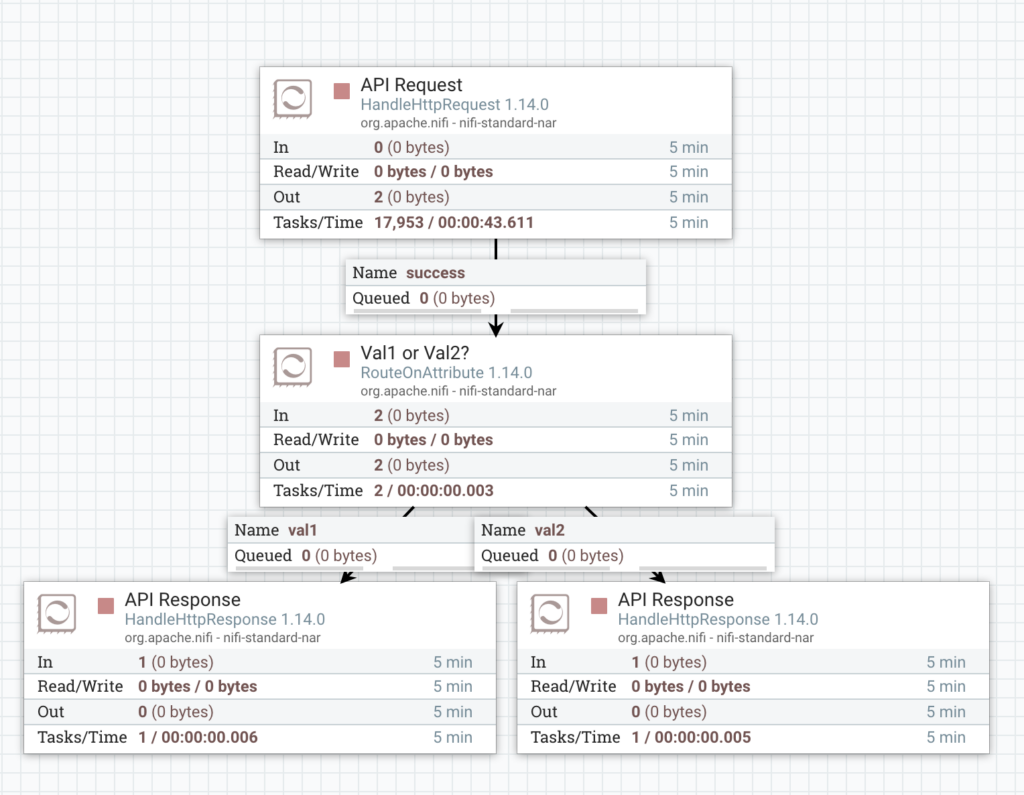
Start all the processors and test it with cURL. In this cURL we are passing a URL parameter param1 with the values val1 or val2. This parameter becomes an attribute on the FlowFile for this request (http.param.param1). The RouteOnAttribute accesses this attribute and routes based on the value, giving us a 200 response for val1 or a 201 response for val2.
$ curl localhost/api?param1=val1 -i
HTTP/1.1 200 OK
Date: Sun, 08 Aug 2021 19:52:05 GMT
Transfer-Encoding: chunked
Server: Jetty(9.4.42.v20210604)

$ curl localhost/api?param1=val2 -i
HTTP/1.1 201 Created
Date: Sun, 08 Aug 2021 19:52:11 GMT
Transfer-Encoding: chunked
Server: Jetty(9.4.42.v20210604)
In reality, we don’t really want to get different HTTP responses like this. The user of my API (the other NiFi flow) actually wanted some JSON in response. So let’s do that.
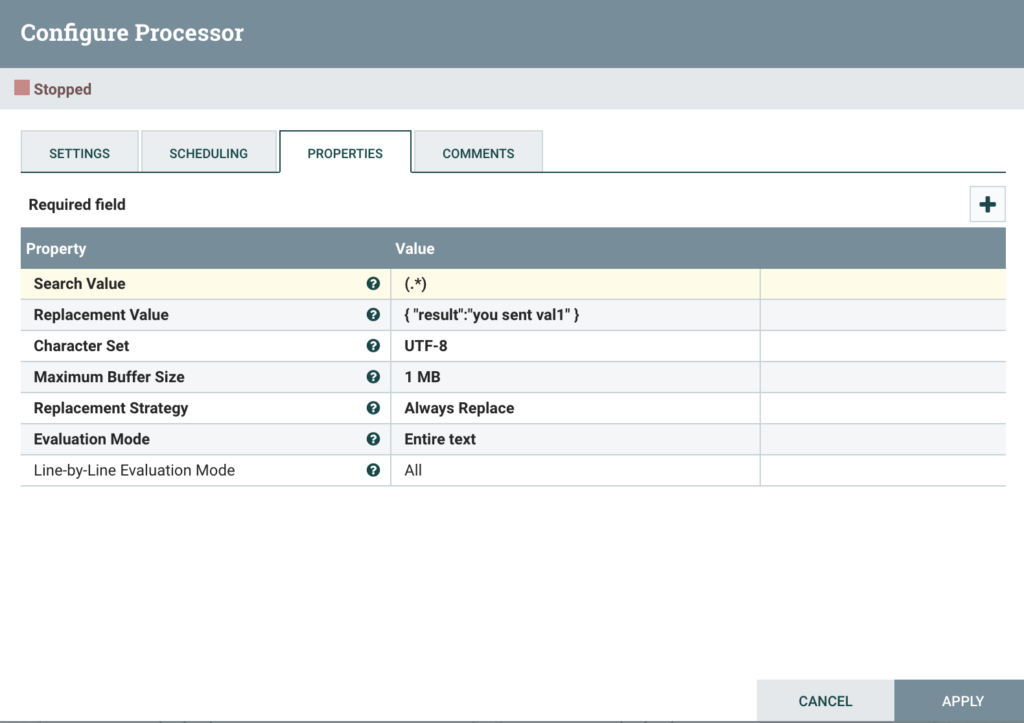
We want to return some JSON in the body of the resonse, so let’s add a ReplaceText. As the FlowFile content is currently empty (null), we need to set Replacement Strategy to Always Replace and Evaluation Mode to Entire Text (you will see mime-type errors without these settings).
Lastly, we need to set Replacement Value to the full content we want in our response, which is going to be a bit of JSON.
{
  "result": "you sent val1"
}
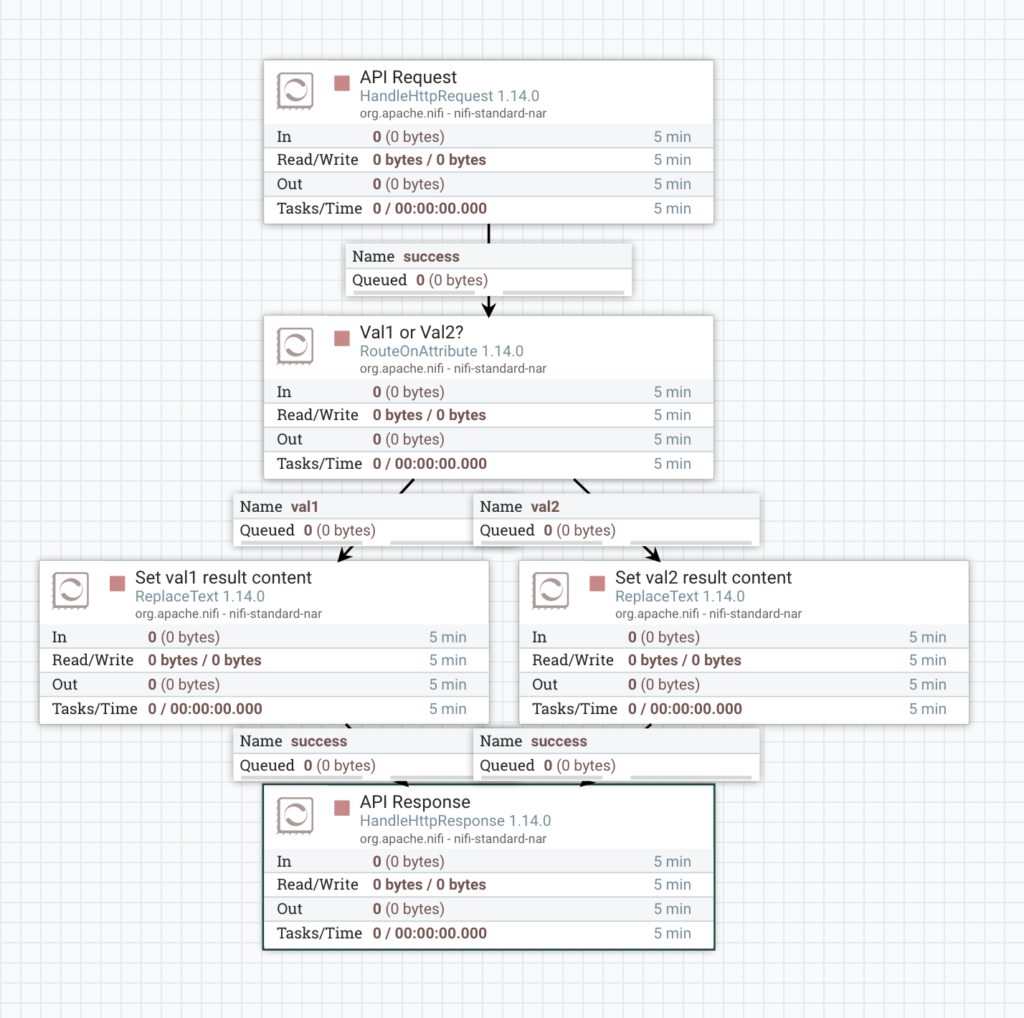
We need to do the same thing for val2, so make a copy of the ReplaceText processor and change the JSON to say val2 instead.

We don’t both HandleHTTPResponse’s anymore, so delete the second one. Now connect the RouteOnAttribute to the 2 ReplaceText’s and then connect the 2 ReplaceText’s to the single HandleHTTPResponse.
Start all the processors and test it wth curl.
$ curl localhost/api?param1=val1
{
 "result":"you sent val1"
}
$ curl localhost/api?param1=val2
{
 "result":"you sent val2"
}
We now have a very basic REST API that is able to return different results based on user provided parameters. You can extend this with much more complexity - supporting more paths, allowing more HTTP methods, accepting more parameters, doing more complex routing logic and handling error with appropriate HTTP response codes.
Find the flow definition here if you’d like to import the whole thing.